

I get a lot of questions about how I make my bias binding.
Couldn't be easier. Let me walk you through it!
I'm working with a yard of fabric for a queen sized quilt.
Cut off the selvedge.

Open your piece of fabric all the way up.
We are working with a rectangle.

Take the lower right hand corner and
fold it on a diagonal so the left edges are even.

Now pick up the lower left hand point
and fold it over to the upper right.

Take point "A" and fold over to point "B".
 You may have a little flap of fabric.
Just keep wrapping it around.

You're finished folding and ready to start cutting.
In reference to the AB folded edges, trim about 1/4" from the fold.
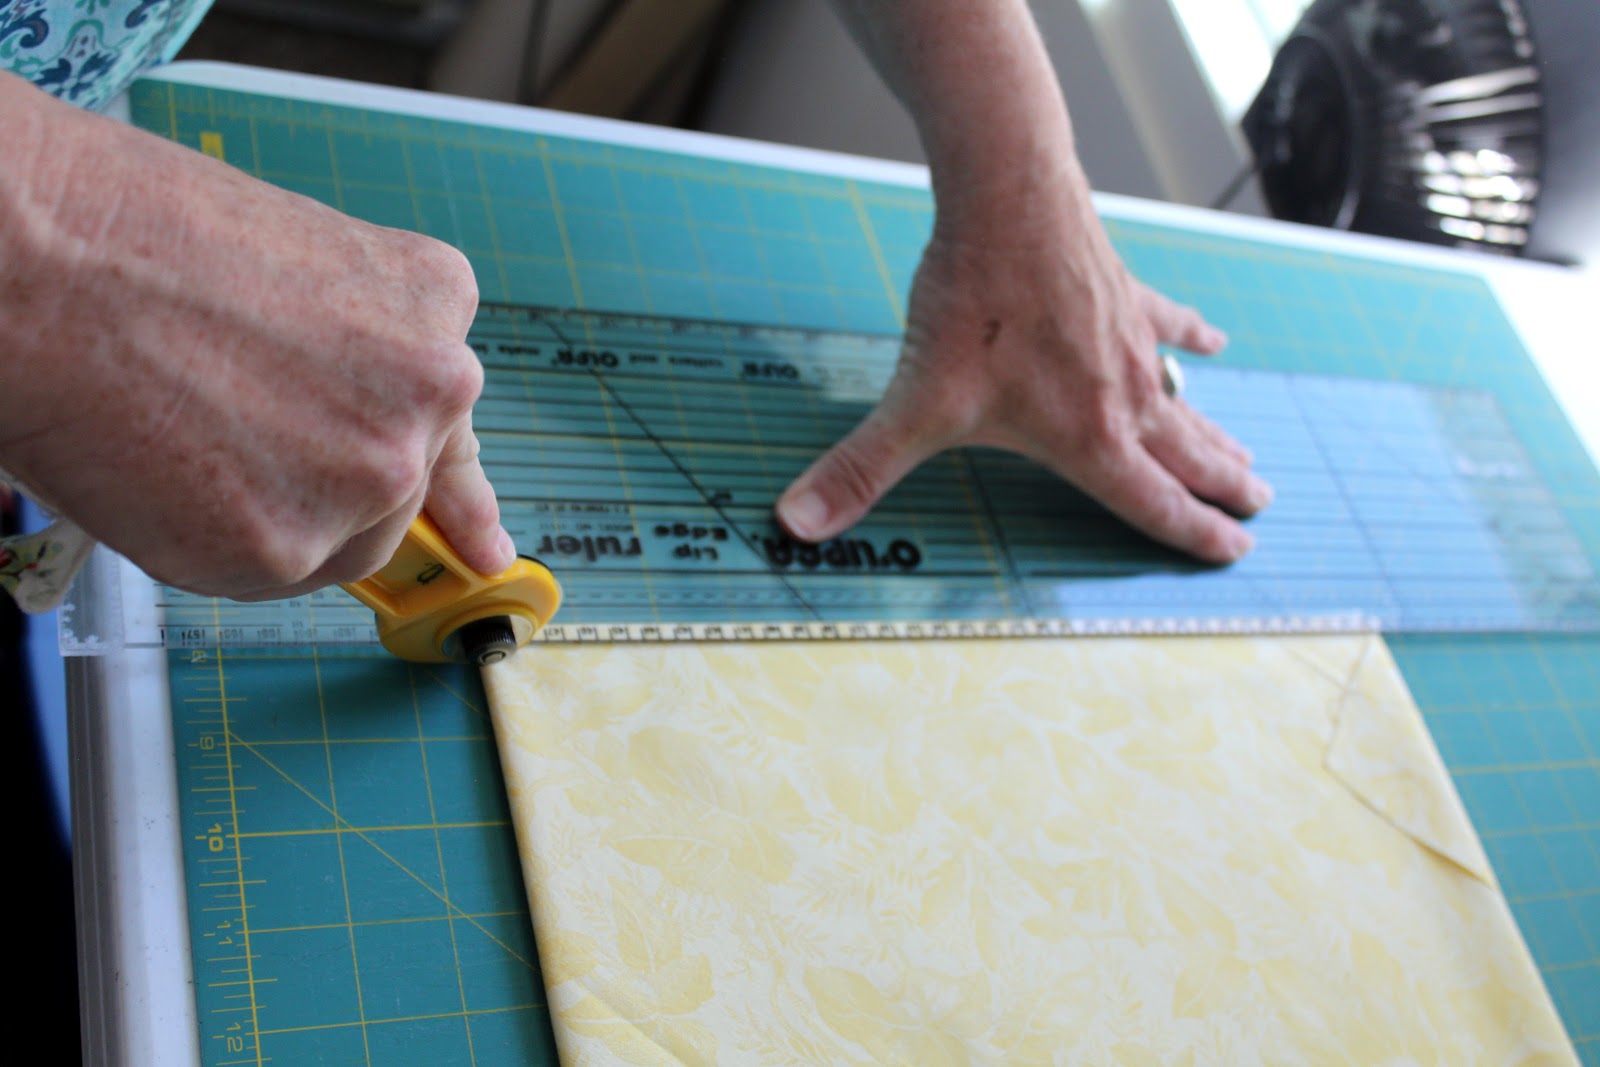

This is the point that you will start to cut your desired width of strips.

The beautiful part of bias strip making is that
your strip ends are already cut at a
diagonal ready to be sewn together.

Anytime you sew diagonals, you have to have a 1/4" point hanging off both ends in order for your strips edges to have a straight finish.


Good Luck!!
I'm ready to give this a go!!! Thanks!
ReplyDeleteYou are welcome! If you have questions - just give me a jingle!
DeleteThanks for this, Kathy. I know how to do the continuous bias binding, but I don't really like it. I saw Terrie do this once in the shop but could never replicate it. I now have the resource to do it!!! Thanks! I'm getting ready to bind the quilt you quilted for me. I think I'm going to do some piping between the binding and border, so it's going to take me a while! haha!
ReplyDeleteI know - the continuous bias always confused me! Sheesh....piping and binding - I'm thoroughly impressed!!! Can't wait to see it....next year, perhaps? hahaha!
DeleteHow did I miss this?? You are a life saver! Thank you for the tutorial I will be using it very soon. I am handquilting an antique quilt with a lot of curved edges.
ReplyDeleteHave a wonderful weekend. :0) love. Trish
The Double Wedding Ring, right? You'll certainly need the bias binding! I'm sure it's stunning - your work is so beautiful!
ReplyDeleteKathy, I just made the binding for another quilt and I used your tutorial. Worked out just great. Much nicer binding and less stressful for me. Thanks again!
ReplyDeleteI'm so glad you could use this! I usually make bias binding because it's easier to work with and always looks nice. It's a "happy" binding!
DeleteGreat! tutorial. Thank You. I recently made a "bias" binding for a queen size quilt 'trying' the continuous method. It was a disaster! I'll be doing it this way from now on. Glad I found your blog today. I love Montana also. I grew up in Ashton Idaho!
ReplyDeleteHi thanks for the tutorial.
ReplyDeleteAle
Costa Rica
Brilliant! I have been doing continuous bias binding with no issues *forever* but boy is this quick when you just need enough for a small quilt!
ReplyDeleteThanks for sharing!
Thank you so much for the instruction of 1/4in hang off. I followed someone elses tutorial and had to get out the seam riper. I will never forget the 1/4 rule. My life just got a little easier!
ReplyDeleteI am so glad this is helpful - the 1/4" thing applies to all projects & piecing whenever you are sewing angles. Thanks for the compliments!
Delete